极简 JavaFX 项目脚手架
一、说明
- OpenJDK11
- Maven 3.8.2
- IDEA 2021.2.2
二、步骤
新建 JavaFX 项目
在我们的 JavaStudy 目录,新建 java-jfx 项目
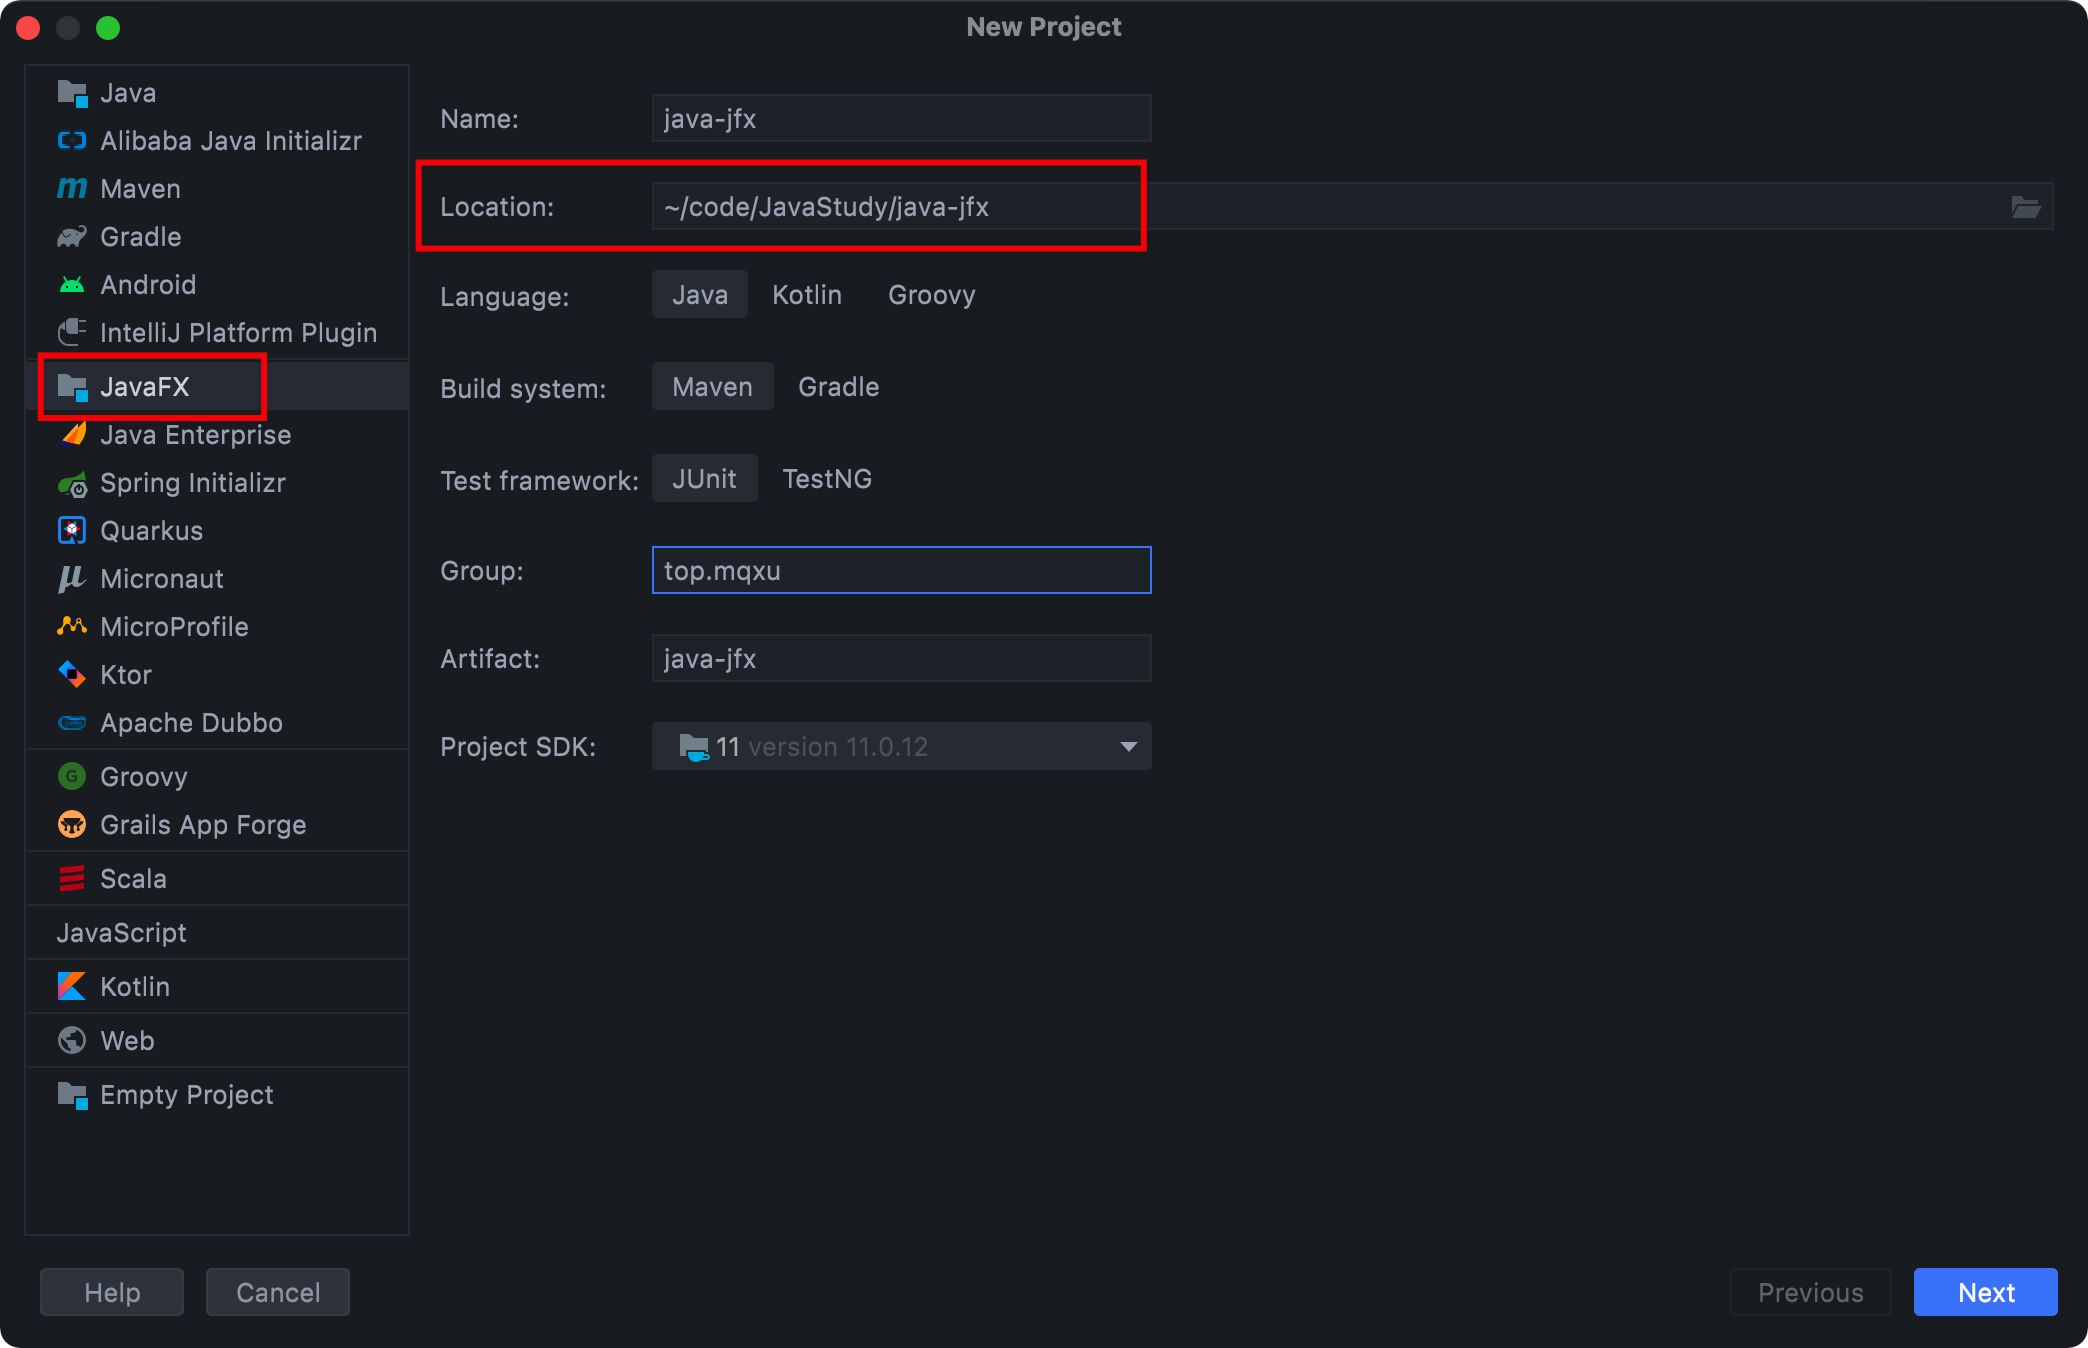
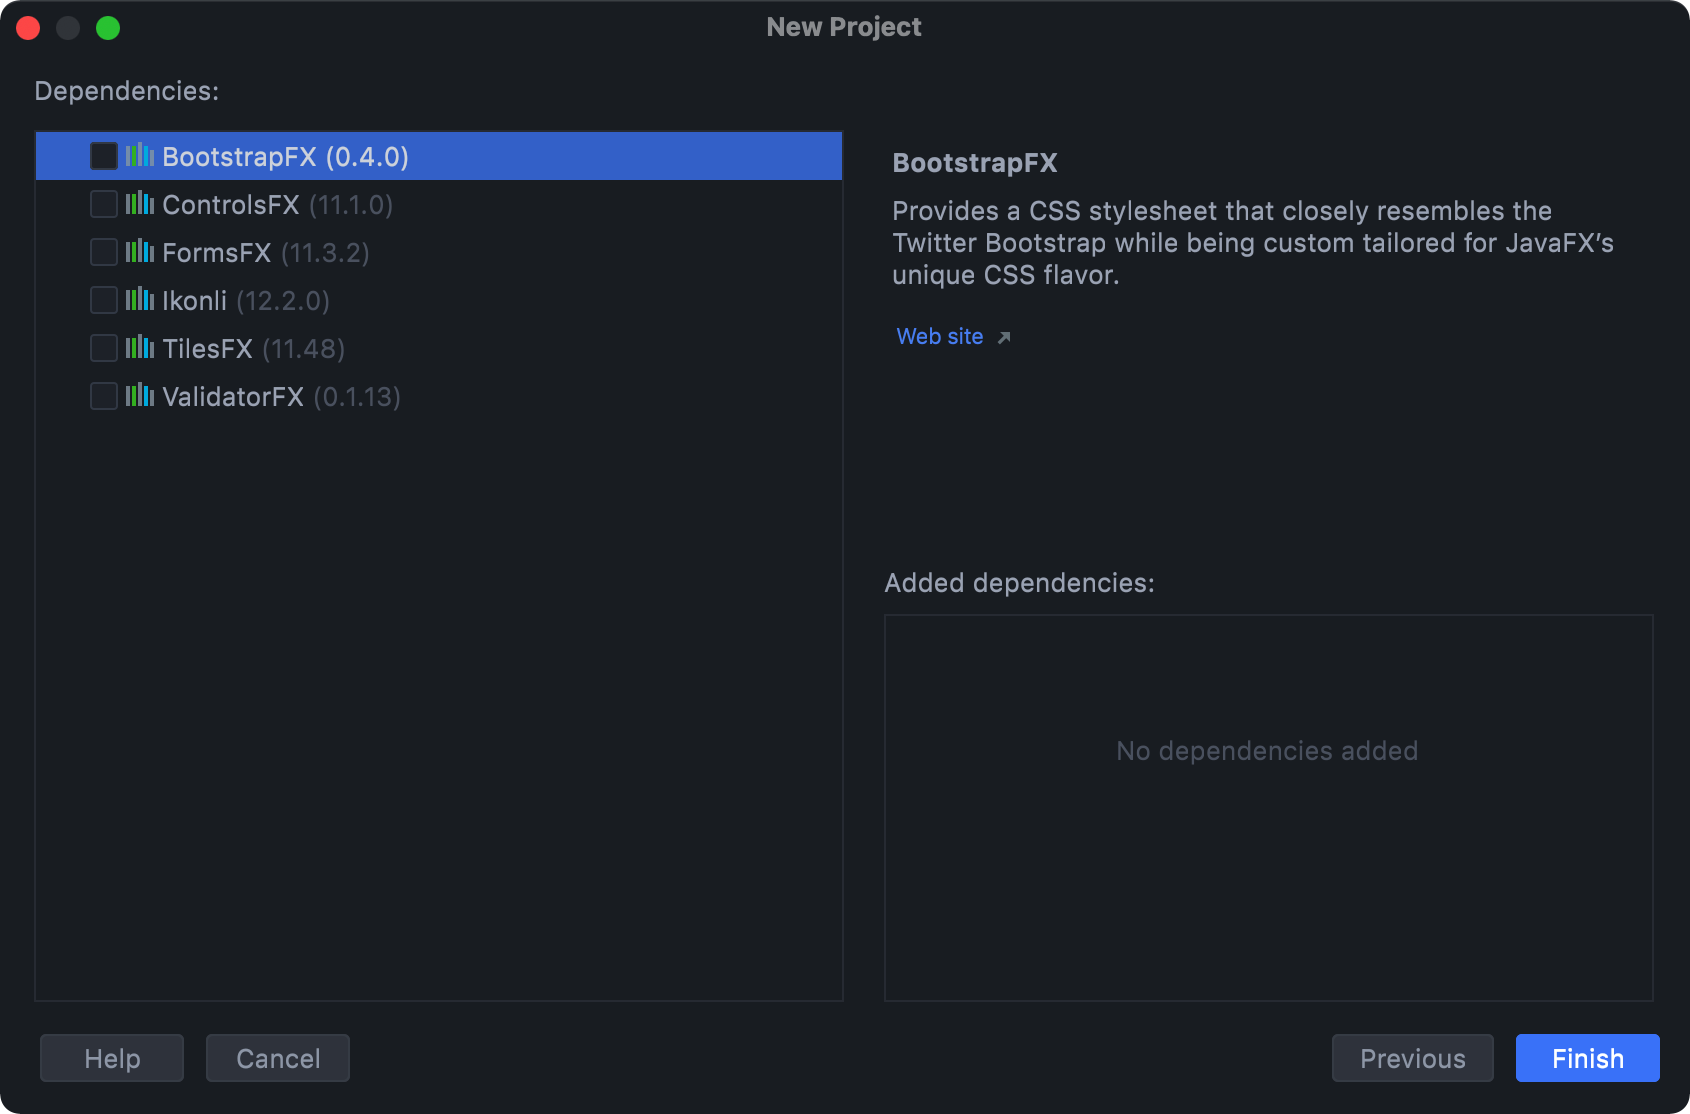
不勾选任何依赖
修改 pom.xml 文件
新建完毕后,修改项目的 pom.xml 文件。主要修改:
- 在属性中统一管理 javafx 的版本
- 使用 maven-assembly-plugin 插件打包
参考如下
<?xml version="1.0" encoding="UTF-8"?>
<project xmlns="http://maven.apache.org/POM/4.0.0"
         xmlns:xsi="http://www.w3.org/2001/XMLSchema-instance"
         xsi:schemaLocation="http://maven.apache.org/POM/4.0.0 https://maven.apache.org/xsd/maven-4.0.0.xsd">
    <modelVersion>4.0.0</modelVersion>

    <groupId>top.mqxu</groupId>
    <artifactId>java-jfx</artifactId>
    <version>1.0-SNAPSHOT</version>
    <name>java-jfx</name>
    <packaging>jar</packaging>

    <properties>
        <project.build.sourceEncoding>UTF-8</project.build.sourceEncoding>
        <maven.compiler.source>11</maven.compiler.source>
        <maven.compiler.target>11</maven.compiler.target>
        <javafx.version>11.0.2</javafx.version>
    </properties>

    <dependencies>
        <dependency>
            <groupId>org.openjfx</groupId>
            <artifactId>javafx-controls</artifactId>
            <version>${javafx.version}</version>
        </dependency>
        <dependency>
            <groupId>org.openjfx</groupId>
            <artifactId>javafx-fxml</artifactId>
            <version>${javafx.version}</version>
        </dependency>
    </dependencies>

    <build>
        <!-- 项目最终打包名-->
        <finalName>java-jfx</finalName>
        <plugins>
            <!--maven编译插件-->
            <plugin>
                <groupId>org.apache.maven.plugins</groupId>
                <artifactId>maven-compiler-plugin</artifactId>
                <version>3.8.1</version>
            </plugin>

            <!--使用maven-assembly-plugin插件打包,可将项目依赖的jar包都打进去-->
            <plugin>
                <groupId>org.apache.maven.plugins</groupId>
                <artifactId>maven-assembly-plugin</artifactId>
                <version>3.1.0</version>
                <!--配置执行器-->
                <executions>
                    <execution>
                        <id>make-assembly</id>
                        <!-- 绑定到package生命周期阶段上 -->
                        <phase>package</phase>
                        <goals>
                            <!-- 只运行一次 -->
                            <goal>single</goal>
                        </goals>
                    </execution>
                </executions>
                <configuration>
                    <!--打包的文件名,上面配置过了-->
                    <finalName>${project.build.finalName}</finalName>
                    <archive>
                        <manifest>
                            <mainClass>top.mqxu.java.jfx.Launcher</mainClass>
                        </manifest>
                    </archive>
                    <!--将项目依赖的jar包一并打入-->
                    <descriptorRefs>
                        <descriptorRef>jar-with-dependencies</descriptorRef>
                    </descriptorRefs>
                    <appendAssemblyId>false</appendAssemblyId>
                </configuration>
            </plugin>
        </plugins>
    </build>
</project>
修改项目
图片和图标文件可自行准备
项目结构修改
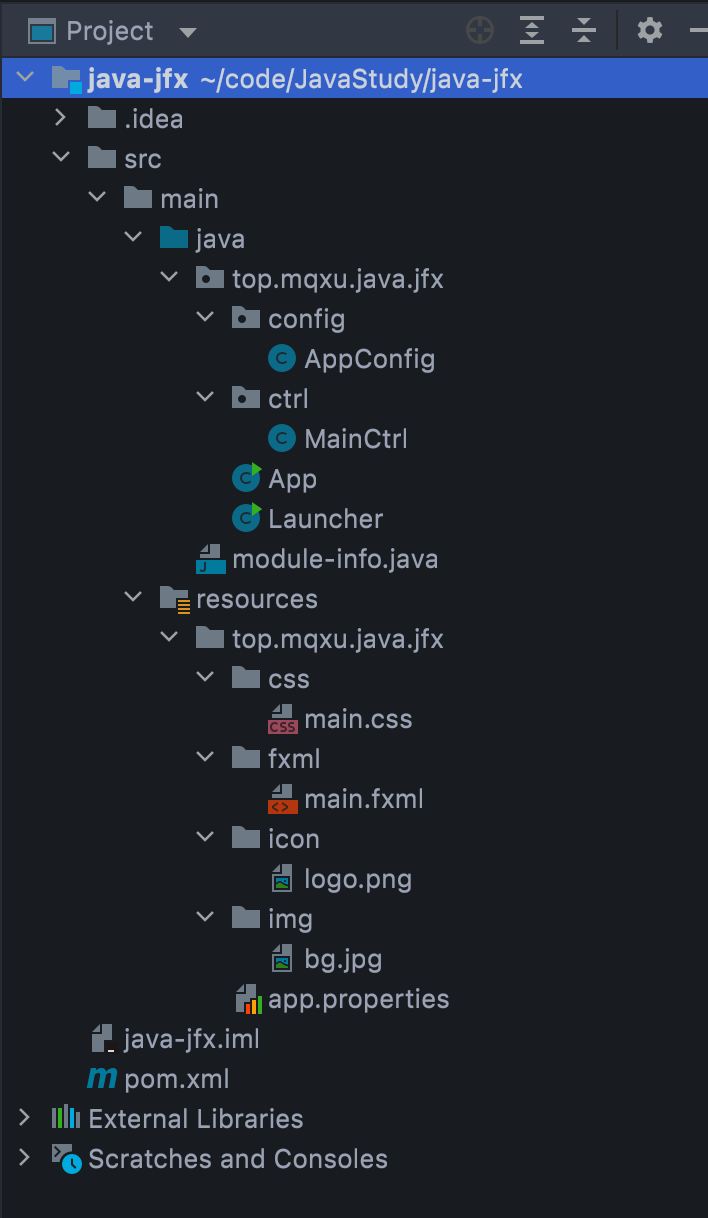
代码修改
- AppConfig.java
package top.mqxu.java.jfx.config;


import top.mqxu.java.jfx.App;

import java.io.IOException;
import java.io.InputStream;
import java.util.Properties;

/**
 * 应用配置
 *
 * @author mqxu
 * @date 2021/09/30
 */
public class AppConfig {
    /**
     * 应用默认标题,如果app.properties有配置值,就被覆盖
     */
    public static String title = "JavaFx Application";
    /**
     * 应用默认图标
     */
    public static String icon = "icon/logo.png";
    /**
     * 窗口默认宽度
     */
    public static int stageWidth = 640;
    /**
     * 窗口默认高度
     */
    public static int stageHeight = 480;
    /**
     * 默认允许调整窗口尺寸
     */
    public static boolean stageResizable = true;

    public static void init() {
        try {
            Properties properties = new Properties();
            InputStream in = App.class.getResourceAsStream("app.properties");
            properties.load(in);
            title = properties.getProperty("title");
            icon = properties.getProperty("icon");
            stageWidth = Integer.parseInt(properties.getProperty("stage.width"));
            stageHeight = Integer.parseInt(properties.getProperty("stage.height"));
            stageResizable = Boolean.parseBoolean(properties.getProperty("stage.resizable"));
        } catch (IOException e) {
            e.printStackTrace();
        }
    }
}- MainCtrl.java
package top.mqxu.java.jfx.ctrl;

import javafx.event.ActionEvent;
import javafx.fxml.Initializable;
import javafx.scene.control.Alert;
import javafx.scene.control.Button;
import javafx.scene.layout.Pane;

import java.net.URL;
import java.util.ResourceBundle;

/**
 * 主界面控制器
 *
 * @author mqxu
 * @date 2021/09/30
 */
public class MainCtrl implements Initializable {

    public Pane rootPane;

    public Button btnAlert;

    @Override
    public void initialize(URL location, ResourceBundle resources) {
        System.out.println("initialize: " + location.getPath());
    }

    /**
     * 弹出框按钮单击事件
     *
     * @param actionEvent 事件对象
     */
    public void onBtnAlertClick(ActionEvent actionEvent) {
        Alert alert = new Alert(Alert.AlertType.INFORMATION);
        alert.setContentText("你好");
        alert.show();
    }
}- App.java
package top.mqxu.java.jfx;

import javafx.application.Application;
import javafx.fxml.FXMLLoader;
import javafx.scene.Parent;
import javafx.scene.Scene;
import javafx.scene.image.Image;
import javafx.stage.Stage;
import top.mqxu.java.jfx.config.AppConfig;

import java.io.IOException;
import java.util.Objects;

/**
 * 主类
 *
 * @author mqxu
 * @date 2021/09/30
 */
public class App extends Application {

    @Override
    public void start(Stage stage) throws IOException {
        // 加载并创建主场景
        Parent root = FXMLLoader.load(Objects.requireNonNull(App.class.getResource("fxml/main.fxml")));
        // 加载外部样式,这样窗口中所有组件可用,绑定在fxml组件上的样式只能本组件可用
        root.getStylesheets().add(Objects.requireNonNull(App.class.getResource("css/main.css")).toExternalForm());
        Scene scene = new Scene(root, AppConfig.stageWidth, AppConfig.stageHeight);
        // 设置窗口信息
        stage.setTitle(AppConfig.title);
        stage.setResizable(AppConfig.stageResizable);
        stage.getIcons().add(new Image(Objects.requireNonNull(App.class.getResourceAsStream(AppConfig.icon))));
        stage.setScene(scene);
        stage.show();
    }

    public static void main(String[] args) {
        AppConfig.init();
        launch();
    }
}
- Laucher.java
package top.mqxu.java.jfx;

/**
 * 启动类
 * @author mqxu
 * @date 2021/09/30
 */
public class Launcher {

    public static void main(String[] args) {
        App.main(args);
    }
}
- Module-info.java
本文件为 JDK9 之后模块化的特征,按需引入
注意:这里的模块名就是本模块的 artifactId,如果多个单词如 java-jfx,则变为 java.jfx
module java.jfx {
    requires javafx.controls;
    requires javafx.fxml;

    opens top.mqxu.java.jfx.ctrl to javafx.fxml;
    exports top.mqxu.java.jfx;
}- main.css
.root {
  -fx-background-image: url(../img/bg.jpg);
  -fx-background-size: cover;
}

.title {
  -fx-font-size: 30;
  -fx-text-fill: #8668a4;
}

.btn {
  -fx-min-width: 100;
  -fx-min-height: 40;
  -fx-background-color: #8668a4;
  -fx-text-fill: #f6f6f6;
  -fx-font-size: 16;
}- main.fxml
<?xml version="1.0" encoding="UTF-8"?>

<?import javafx.scene.control.*?>
<?import javafx.scene.layout.*?>
<?import javafx.scene.image.ImageView?>
<?import javafx.scene.image.Image?>
<?import javafx.geometry.Insets?>

<!--垂直布局容器,元素之间间距为20,对齐方式底部居右-->
<VBox fx:id="rootPane"
      xmlns="http://javafx.com/javafx" xmlns:fx="http://javafx.com/fxml"
      spacing="20" alignment="BOTTOM_RIGHT"
      fx:controller="top.mqxu.java.jfx.ctrl.MainCtrl">
    <!--内边距-->
    <padding>
        <Insets bottom="20" right="40"/>
    </padding>
    <!--ImageView容器指定大小,内部图片适应其大小-->
    <ImageView fitWidth="110" fitHeight="100">
        <Image url="https://cdn.jsdelivr.net/gh/mqxu/wiki-image@master/avatar/notebook.ctbin289cgw.png"/>
    </ImageView>
    <!--label使用main.css中的样式-->
    <Label text="JavaFx 11 + JDK 11" styleClass="title"/>
    <!--button使用main.css中的样式,如果用style=""的形式,就是内联样式-->
    <Button fx:id="btnAlert" text="提示框" onAction="#onBtnAlertClick" styleClass="btn"/>
</VBox>
- app.properties
本文件为应用的属性文件,这样将一些主要参数分离的做法也比较工程化
title=JavaFx Quick Start
icon=icon/logo.png
stage.width=800
stage.height=600
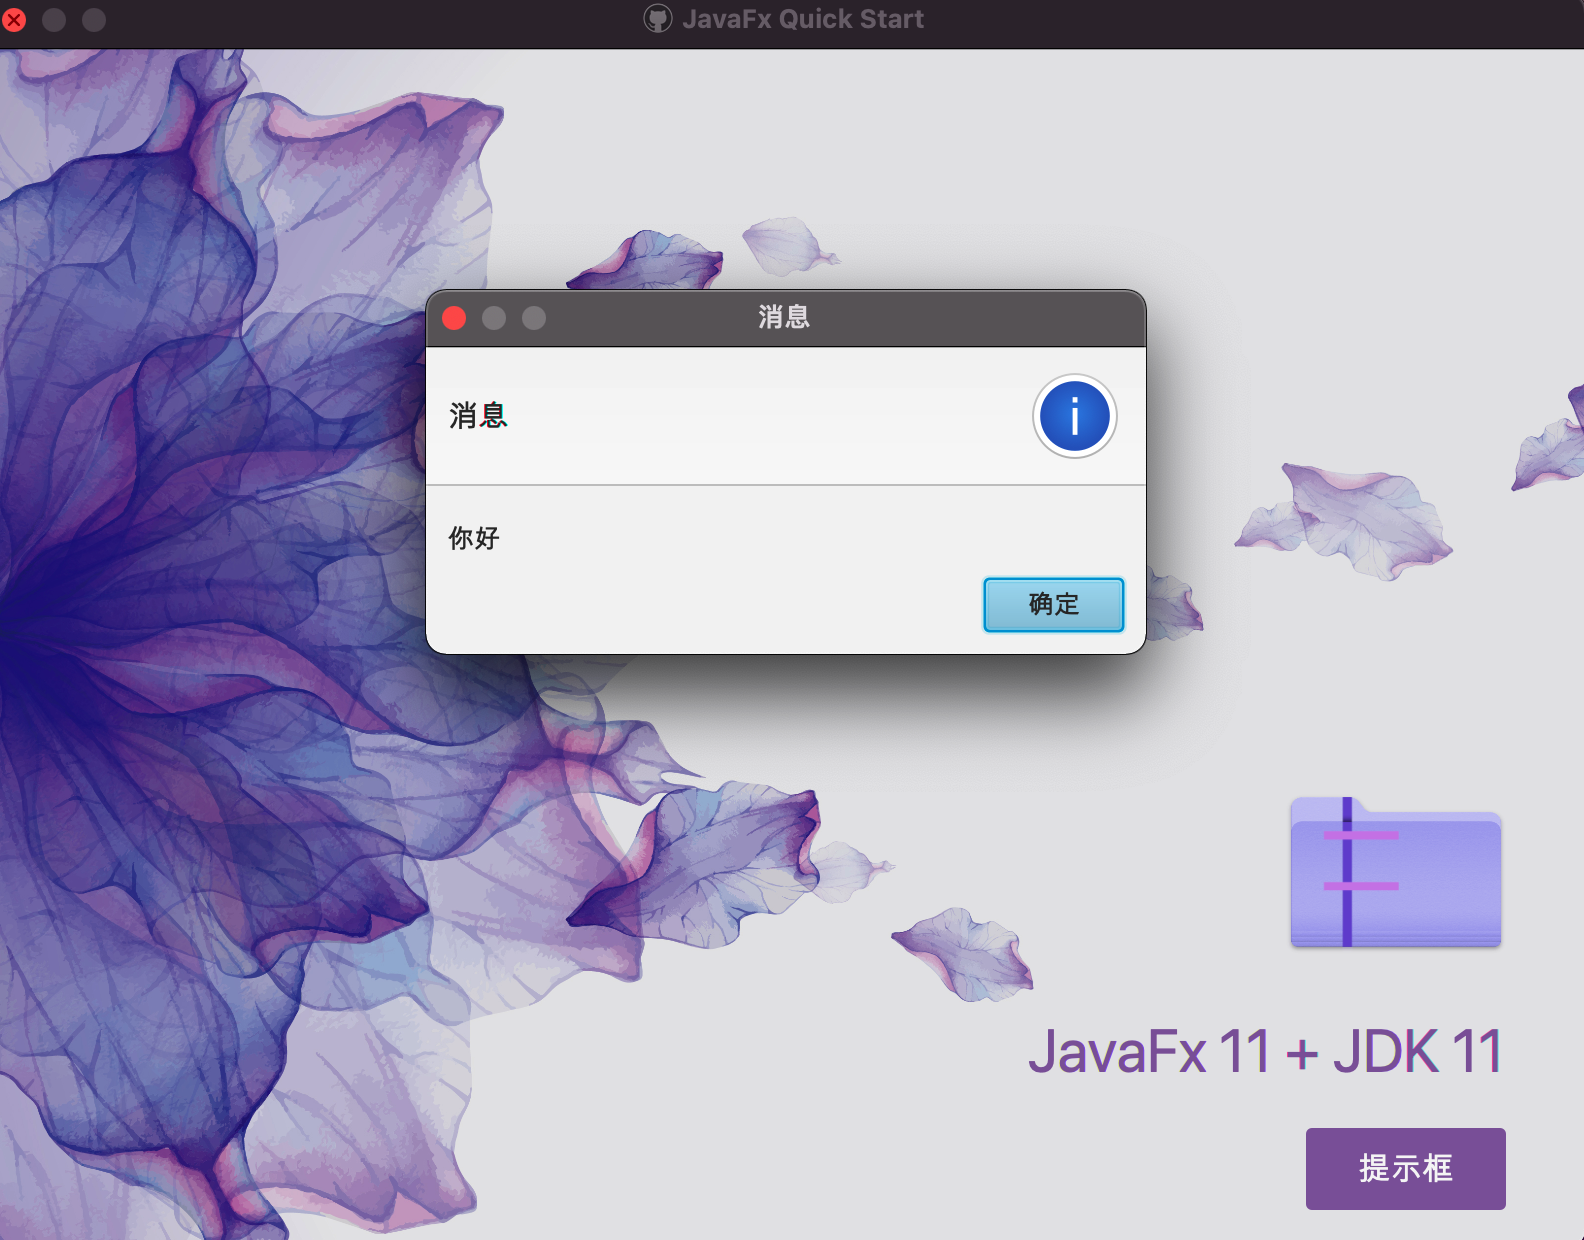
stage.resizable=true三、运行项目
运行 App.java,效果如图,点击按钮弹出对话框(找图配颜色花了一些时间)
四、 打包项目
右边 Maven 视图,分别双击 clean、package
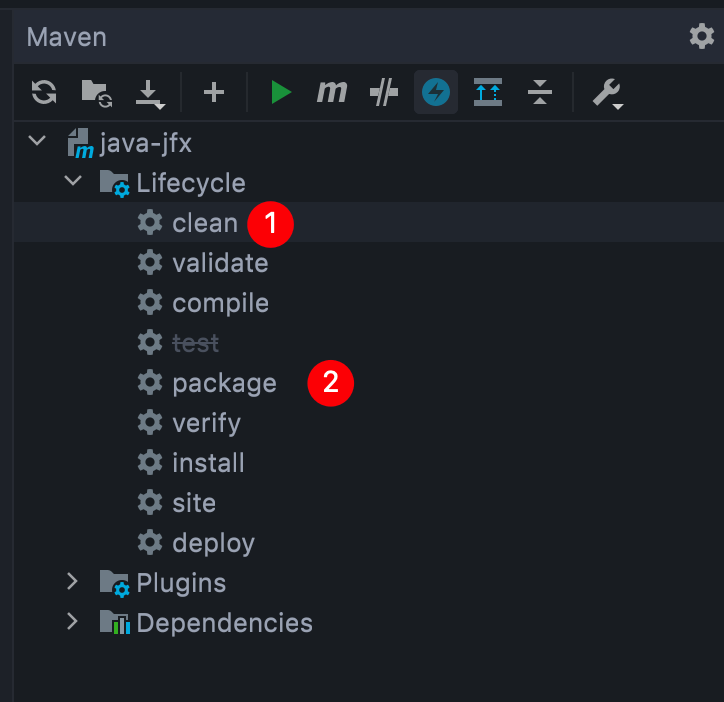
即可在 target 目录生成打好的 jar 包

进入 target 目录启动命令行,运行效果一样,👌

推送你的 Github 远程仓库,让 JavaStudy 拥有第二个成员吧~